Sunday, May 27, 2012

UHA: Reusing socks


The Universal Household Assistant promises to tell you "what every person should know." What is so interesting is that the book was published in 1884. Some of the information is good, some very outdated and some quite laughable by today's standards. Every Sunday I will bring you an interesting tidbit that I find in my book. Enjoy!

Skirt for a child: A good way to utilize ribbed socks when the feet are past wearing, is to cut the legs off straight above the heel. Open up the back, sew or crochet enough of them together to give width for a child's skirt, making shell trimming for the bottom, and sewing in a bank at the waist. These are warm, durable, pretty and little trouble to make.

If I were a handy sewer, I would have to try this!

Saturday, May 26, 2012

Christmas Wreath

I don't really have a tutorial this time, just a couple pictures of a project that I have wanted to make for a long time. I have collected ornaments for a long time to make this wreath and last week I finally sat down make put it all together. To help with filling in the cracks, I covered the wreath with that red, velvet ribbon that you can get copious amounts of at Christmas.


I used some new, but mostly used ornaments. The best advice I have for you is use a lot of hot glue and keep the wreath laying flat. If you move it too much, it won't lay flat on the wall when you hang it. I have had to go back and re-glue some of the small filler ornaments. Good luck!


Thursday, May 24, 2012

Trivet Pin Board

Pinterest has everyone pin-happy, but I still like to actually use a physical pin board for bits and scraps and ideas. While I was at Ikea a few weeks back I bought several packs of cork trivets to make my own cork pin boards. It was an easy afternoon activity to put together several groupings.


Your basic materials are cork mats or trivets, metal mending plates, screws, screw driver, and a small d-ring hanger. You can get a lot fancier with paint and ribbon but this is the original simple idea. 


Place the cork pieces in the position you want them to be in, use the mending plates and screws to connect them together. 


Attach the d-ring hanger at the top of the board, and hang it where you want to use it. I used a little hot glue to hold the screw in place for the hanger, it also keeps the screw from scratching the wall. I also used trivets because at Ikea they are pretty thick and inexpensive. Sometimes cork at a regular department store can get expensive.


This is where I hung one of the boards I made. It hangs on the corner of my corner cabinet, no irony intended!


Tuesday, May 22, 2012

Patchwork Shoes


I know it seems I fell off the face of the earth, but I have been a busy girl. My daughter, M, finished preschool last week and since then I have had to be sole entertainment. But enough with excuses. I was searching around Pinterest one day when I happened upon this idea. My mom quilts and a while back she gave me a huge box of scraps, and I just knew this was the perfect idea to use some of them. It took me a while to find inexpensive shoes to use, now that Toms are so hot, all the skippies are more expensive than usual. Skippies is what we used to call no-name shoes when I was in high school 100 years ago.


What you need is a bunch of coordinating scraps, fabric fusion glue, a pair of shoes. scissors and a paint brush. It should be a cheap paint brush because you will probably have to throw it away afterwards. Now the blog I read mentioned thinning the glue with water to make it go farther, but I found that I had a hard time getting the fabric to stick when I did that so I used it at original strength. I also found that it worked best when I put glue on the shoe, on the back of the fabric and over the top of the fabric. That helped hold the fabric in place.


Basically you cut scraps to fit the edge of the shoes and glue away! It takes a little bit of time to get the fabric to lay where you want and to cut it to fit. My main problem with this project has been after the glue dried. The shoes are incredibly stiff. I have washed them but I think I will need to wash them again to help with that problem. Also next time I will use only two or three fabrics to make a more cohesive design. 

Saturday, May 12, 2012

Spinach manicotti


I think that this dish is considered to be a difficult dish, however this recipe certainly makes it simple. It is also a nice change when you want something without meat.

You will need: 7-8 manicotti shells | non-stick spray | 1 15oz container ricotta cheese
1 cup grated Parmesan | 1 10 oz package spinach, thawed and squeezed dry
2 cups prepared marinara sauce | 2 tbsp cream (I used half and half)

Preheat oven to 375 degrees. Boil the pasta for 7-8 minutes, drain and place in an 8-inch square baking pan that has been sprayed with non-stick cooking spray. In a medium bowl, mix the spinach, ricotta, 1/2 cup of Parmesan, s&p. Transfer to a plastic bag, squeeze bag and cut off corner. Squeeze filling into the shells, filling halfway from one side and then switching to the other side. Place back into baking dish.

In a separate bowl, mix the cream and marinara sauce. Pour over the top of the filled manicotti.  Sprinkle the rest of the Parmesan over the top. Bake for 30 minutes.


Friday, May 11, 2012

Tomato jam

This past weekend I spent some time in Atlanta and ate at a local Italian place. For lunch my friend and I had some pretty unique sandwiches. I had a pimento cheese and bacon jam panini and she had a meatloaf panini with tomato jam. Both were fantastic so I want to recreate them both at home. I am still working on the bacon jam but I did make a batch of tomato jam and I want to share it with you.


You need 5lb of tomatoes, chopped. These are some tomatoes I froze from last summer, aren't they gorgeous? They worked fine, but I did drain them as they thawed.


The rest of the cast of characters: 3 1/2 cups sugar | 8tbsp lime juice | 2 tsp freshly grated ginger
1tsp cinnamon | 1/2 tsp ground cloves | 1tbsp salt | 1 tbsp red pepper flakes

Combine all ingredients in a large pot. Bring to a boil, then reduce and simmer. Stir regularly and cook until it reduces to a jam-like consistency. This takes about 2 hours. 


When the jam has cooked down enough, fill sanitized jars, leaving 1/4 inch of head space. Wipe rims, apply lids and twist on rings. Process in a boiling bath for 20 minutes. When time is up, removes jars from water bath and cool. Be sure to test your seals. Store in a cool, dark place for up to a year.

Monday, May 7, 2012

Chicken pomodoro

It sounds so fancy but couldn't be any easier or tastier. No need to order this at a restaurant any more!


You will need: 1lb boneless, skinless chicken (I use 5-6 tenders) | 3tbsp olive oil | 1 onion chopped fine
4 garlic cloves, minced | 1 14.5 oz can of Italian diced tomatoes | 1/3 cup heavy cream

Pat chicken dry and season with s&p. Heat 1tbsp olive oil in a large skillet over medium-high heat. Cook chicken until done, transfer to a plate.

Heat remaining oil in the pan. Cook onion until softened, about 5 minutes. Add garlic and cook about 30 seconds. Stir in tomatoes, cream and 1/4 tsp salt and bring to a boil. Add chicken back to the pan (I usually go ahead and cut the chicken into bite size pieces before adding back to the pan). Simmer about 10-15 minutes minutes or until the sauce has thickened.

Serve over rice or pasta.


Sunday, May 6, 2012

UHA - preserving wings of birds


The Universal Household Assistant promises to tell you "what every person should know." What is so interesting is that the book was published in 1884. Some of the information is good, some very outdated and some quite laughable by today's standards. Every Sunday I will bring you an interesting tidbit that I find in my book. Enjoy!


Place them as you wish and dry them slowly before the fire. We cure turkeys' wings by spreading them on the hearth and placing a smoothing iron on them to hold them in place until the moisture and oil be dried out; sometimes it takes several days.

Thursday, May 3, 2012

Perfect potpie

I like chicken pot pie. I like the pie crust on the top and bottom, I like the kind that only has a top crust. I have found a recipe that makes a very delicious top crust that uses very common ingredients and cooks up even and pretty.


Filling: Mix together 2 cups of your frozen veggies | 1 1/2 - 2 cups cooked chicken | 1/2 cup milk
1/2 tsp garlic powder | 1 can cream of celery | 1 can cream of chicken or mushroom

Spread into a greased 13x9 pan.

Crust: 1/2 cup butter, melted | 1 cup all purpose flour | 1 cup milk | 1/4 tsp pepper | 1/2 tsp salt
2 tsp baking powder

Mix all ingredients together, it will be a little lumpy. Spread evenly over the veggie mixture. Bake at 400 degrees until golden, about 30-35 minutes.

Tuesday, May 1, 2012

Powder detergent

Not to get all granola-y on you but I was checking some blogs about making things from scratch and came across several folks who make their own detergent. Some people make their own liquid detergent and I read about that, but the effort outweighed the benefit to me. I also read a few "recipes" about powdered detergent and thought it may be worth trying.


All you need is 1 cup super washing soda | 1 cup Borax | 1 cup grated soap (I used Fels Naptha).

All the recipes that I found had twice as much soap as soda or Borax, but I felt that was too much so I adjusted and it works just as well. You toss about 2tbsp in with your wash and it gets clean and smells good. If you want to check out the blog I got my information from, she talks about what the different ingredients do for your laundry. She also has lots of other recipes for making things from scratch in your home.  FYI: 1 bar of soap = 2 cups grated.

http://heart-hands-home.blogspot.com/

Monday, April 30, 2012

Two-ingredient lemon bars (?)

I can hardly resist a recipe with only two (or three) ingredients, so when I saw this one on Pinterest I knew I needed to try it.


All you need is: an angel food cake mix | lemon pie filling | confectioners sugar. 
Mix the lemon pie filling with the cake mix. Be careful, though, because the cake mix is very light and it will seem like the two won't mix well. Then pour it into a 9x13 pan. I sprayed mine with a flour/cooking spray combo that you can get at the store. It helped keep the cake from sticking to the pan. Then bake in a preheated over at 350 degrees for about 20-25 minutes.


If you are so inclined, you can dust it with powdered sugar. To me this was less like a lemon bar and more like a light lemon cake. Try it out for yourself and tell me what you think!

Sunday, April 29, 2012

UHA - Cleaning windows


The Universal Household Assistant promises to tell you "what every person should know." What is so interesting is that the book was published in 1884. Some of the information is good, some very outdated and some quite laughable by today's standards. Every Sunday I will bring you an interesting tidbit that I find in my book. Enjoy!


Chamois or buckskin cleans a window very nicely; but if the wings of turkeys, geese or large fowls are saved and well dried there is nothing better - far more economical than chamois, beside removing all the dirt more effectually. With the wings all the dirt can be taken out of corners, and when done there will be no lint on the glass.
Nothing is better for cleaning stoves, brushing out corners or brushing off furniture than a good clean wing.

NEXT SUNDAY: preserving birds' wings, because I know you are just dying to know how!

Wednesday, April 25, 2012

Bacon Meatballs

Everyone loves bacon, well almost everyone. I met a girl yesterday who does not really care for it. I love bacon but I am not into gratuitous bacon usage. It really makes these meatballs great.


4 strips of bacon | 1/2 cup diced onion | 2 garlic cloves, minced
1lb hamburger meat | 1/2 cup bread crumbs | s&p | 2 eggs, beaten

Preheat your oven to 400 degrees. Coat a broiler pan with cooking spray. Cook bacon in the skillet and set aside. After cooled chop up the bacon. Reserve about a tbsp of bacon grease. Add the onion to the pan. Saute about 3 minutes and add the garlic. Saute for another minute. Set aside to cool. 

In a bowl combine meat, bread crumbs, seasonings, bacon and the garlic/onion mixture. Add in the egg. Form into ball about the size of a walnut and place on the broiler pan. 


Bake for about 10-15 minutes, until browned and cooked through. 


This recipe makes between 22-28 meatballs. We typically eat about 4 each. You can toss the meatballs in your favorite bbq sauce. They freeze easily so feel free to double the recipe.

Monday, April 23, 2012

Roasted radishes

This time of year is something I really look forward to because there is so much wonderful produce available to eat. For a short period of time in the spring you can get fresh radishes. One of my favorite things to do is to roast them, delicious!


All you need for this super easy recipe is about 20 radishes, 1-2 tbsp olive oil and 1-2 tbsp of soy sauce. Preheat your oven to 425 degrees. Wash and cut the radishes into quarters. Toss with the oil and spread out into a single layer on a cookie sheet. I like to line mine with aluminum foil for easier clean-up. Roast the radishes for 20-25 minutes. Sprinkle and toss with the soy sauce and roast for another 5-10 minutes.


The beauty of roasting radishes is that it takes the heat right out of them. This pairs easily with any dish you can think of because even though soy sauce is traditionally used for Asian foods, this does not have an overpowering taste.

Sunday, April 22, 2012

UHA - Secrets of health


The Universal Household Assistant promises to tell you "what every person should know." What is so interesting is that the book was published in 1884. Some of the information is good, some very outdated and some quite laughable by today's standards. Every Sunday I will bring you an interesting tidbit that I find in my book. Enjoy!

First keep warm; second, eat regularly and slowly; third, maintain regularly bodily habits; fourth, take early and very light suppers; fifth, keep a clean skin; sixth, get plenty of sleep at night; seventh, keep cheerful and respectable company; eighth, keep out of debt; ninth, don't set your mind on things that you don't need; tenth, mind your own business; eleventh, don't set yourself up to be a sharper of any kind; twelfth, subdue curiosity; thirteenth, avoid drugs.

Tuesday, April 17, 2012

A Wiggly party revisited


I don't have a lot of pictures to show you all the things that we did but I want to share anyways because I know that there aren't a lot of ideas for a Wiggles party online. The picture shows a play tent I bought at a local kids consignment sale a few years back. Everything else we did can be copied and reused should you need to for your own party.

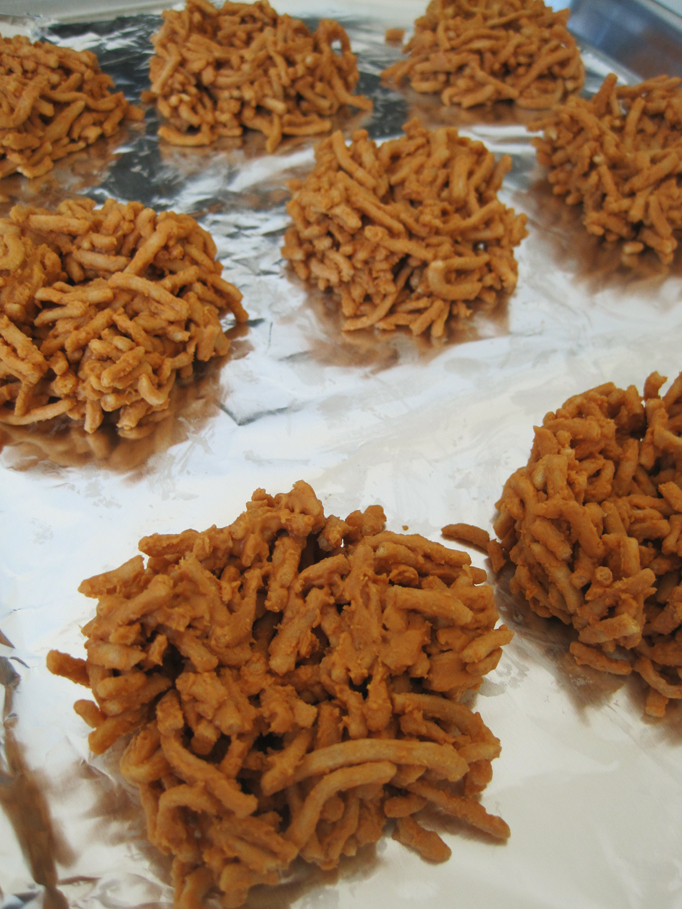
FOOD: Since we were having an afternoon party, I didn't serve lunch type food. I only served a fruit salad made from blueberries, strawberries, pineapple and purple grapes along with "crunchy munchy honey cakes." I shared that recipe a few posts back, I got the recipe from the Wiggles website. The cake I ordered locally from a bakery, and used a picture I found on the internet. We also had icecream, water and juice packs. I called this table "Anthony's Snack Table."


DECOR: This is pretty simple, you can decorate with the four primary colors. I also used green for Dorothy the Dinosaur and black or hot pink for Captain Feathersword. You could also use brown for Wags the dog.

GAMES: This is the biggie. I had three tables setup for crafts, the tent for play (and I had some books in the tent), and a bean bag game that I called "Jeff's Pillow Toss."
The first table was "Music with Murray." The two crafts were to make the twirly spoon drum I have featured in a previous post and a shaker egg. The shaker egg was just a plastic Easter egg filled with rice and taped around the opening.
The next table was for Captain Feathersword. I found a template online for pirate hats made from foam. Google pirate hat template. I would attach it here but since it isn't my personal template, I really can't do that. I precut all the hats and had foam stickers to decorate them. The other craft was a pirate pop-up. Basically you cut a slit in the bottom of a paper cut, print out and cut out a small picture of Captain Feathersword. Then glue the picture to one end of a popsicle stick and insert the other end so that the pirate is "hiding" in the cup. Pop up, pop down!
Finally I had a table for Dorothy the dinosaur. At this table we made garden pinwheels (I wrote a post on this as well), and we had color sheets. I downloaded these from the Wiggles website.

Once everyone seemed done with the crafts,m we played a few rounds of Hot Potato. iTunes has a large selection of Wiggles music that played the whole party. We had a separate dance area with balloons for the kids.

GOODY BAG: I didn't do a goody bag but instead bought a bunch of bubbles and made my own stickers for the tops of the lids. I also took paper lunch bags and made stickers to put on them for the kids to put their crafts. It was a pretty low-sugar party.

I hope you found some useful ideas for your own Wiggle party! Leave me a comment with your own ideas.

Monday, April 16, 2012

How I cut a pineapple

Pineapple is so much better fresh! I don't know if this is how the "pros" do it, but after much trial and error, this is my system for cutting one up.


Step 1: Cut the top off the pineapple.


Step 2: Then cut the bottom off the pineapple and stand it up straight. Start cutting the rind off by cutting in small strips down the side. The smaller the strips, the more circular your pineapple will end up being. Try not to cut the strips too thick, you will be wasting precious pineapple flesh.


Step 3: Once you have all the rind cut off, cut it in half.


Step 4: Cut both of the pineapple pieces in half again lengthwise (quarters). Stand one of the quarters up and trim the core off by cutting the center piece out. Repeat with all the quarters.


Step 5: Turn the quarter piece on the curve part and cut lengthwise into halves, thirds or quarters depending on how big you want the final pieces to be. Then cut widthwise the pineapple. Repeat with all the quarters.


ENJOY!

Sunday, April 15, 2012

UHA - Removing Ink from Carpets


The Universal Household Assistant promises to tell you "what every person should know." What is so interesting is that the book was published in 1884. Some of the information is good, some very outdated and some quite laughable by today's standards. Every Sunday I will bring you an interesting tidbit that I find in my book. Enjoy!

Take up as much (ink) as possible with a spoon, pour cold sweet milk upon the spot and take up with a spoon until the milk is only faintly tinged with ink, then wash with cold water and wipe dry. The writer has in this way removed nearly half a pint of ink from a delicate cream-colored carpet without leaving a stain.

Friday, April 13, 2012

Crunchy munchy honey cakes - sort of

In keeping with the Wiggles birthday party theme, I decided to try and make "crunchy munchy honey cakes," as featured on a Wiggles song. However I ran into trouble finding muesli flakes, so I substituted quick cooking oats. They taste pretty good, however they didn't flatten into a "cake," they stayed ball shaped.

Your cast of characters:

3 cups muesli flakes (or quick cooking oats) | 1/2 cup sugar | 1c self rising flour, sifted | 1c coconut
125 grams butter (about 9 tbsp) | 2tsp honey | 3tbsp milk

Combine dry ingredients. Heat butter, milk and honey over medium heat. Mix well and pour over dry ingredients. Mix well.


Roll into balls the size of walnuts and place on a greased baking tray. Bake in a preheated oven at 350  degrees for about 20 minutes or until golden brown.


I felt they were a tad boring so I melted some chocolate and drizzled over the top. What isn't improved by chocolate?

Wednesday, April 11, 2012

Not just for Easter

As I have mentioned, my sweet girl's birthday is this weekend, so she is going to take a snack to school tomorrow I have done cookies for the last two years and I wanted to do something different. When I was browsing around Pinterest one day, I saw the simple recipe for birds nests. I first had one when I was in elementary school. It is hard to believe that I can remember that far back, but it definitely left an impression. So here is my favorite version. You can make it your own by substituting any kind of meltable chocolate, or by mixing them.


12 oz chow mein noodles | 12 oz butterscotch chips | chocolate eggs, or whatever you want to use as eggs

Melt the butterscotch chips by microwave or by double boiler, the package will have directions. Mix in the chow mein noodles. This is where all your arm curls come in handy.


Set aside while you line a cookie sheet with aluminum foil or parchment paper. Drop the mixture by the spoonful onto the foil/paper and shape into nests. Make an indention in the middle for the eggs. Let set for about an hour.

Add the eggs. See my little helper's hand? She loved adding the eggs herself.


 We packaged the nests in bags and taped them tight to keep the eggs in place. These would be really cute for a wedding or baby shower.

Tuesday, April 10, 2012

A take on the twirly drum

I don't know what they are called but you have seen them - the drums that you twirl with your hands so that it beats itself. I found a picture online of making something like that using a wooden spoon. I thought that would make a great craft for our Wiggles Birthday party! Here is how you make one for yourself.

All you need is a wooden spoon with a hole drilled in the center, ribbon or string, beads, and scissors.


Cut a piece of ribbon about 3-4 inches long. Make a knot at one end and thred two beads onto the ribbon.


Thread the ribbon through the hole in the spoon.

Add two more beads and tie a knot at the end. All you have left to do is twirl away! If it annoys you that the string can slide around, you can try to tie knots right before and after you thred the ribbon through the hole. However it won't effect how the noisemaker works and it is really difficult to tie knots that close to the hole.