Showing posts with label Party. Show all posts

Wednesday, February 1, 2017

Cute Printables for Valentine's Day

With Valentines around the corner, I have been looking for different cards for my two girls to exchange. Back when I had a little more time on my hands, I would design my own. Now there are so many available for free from very talented designers, I just find them online and print them out. It’s a real time saver.
I try to avoid candy around holidays because I know there are food allergies, plus my kids always have way too much candy at the house anyways. This year I have found a cute valentine for my little, A, and it is fitting because she is very into stickers. What I really mean is obsessed. I had some stickers I bought at Target at an after-Valentines sale so all I needed was some artwork and little bags I bought at Hobby Lobby.


My older girl, M,  is a little trickier; she definitely wants to attach candy. I let her browse an Oriental Trading Co. catalogue and she chose an owl theme. I found some really cute artwork online for her Valentines as well, and will probably attach skittles.


I appreciate the parents that go that extra mile for the activities at school, but to be honest one of M’s (my older child) favorite Valentines a few years back was of a lenticular (3D) dinosaur that she carried around for weeks. Kids are so much simpler than adults. 

Tuesday, April 17, 2012

A Wiggly party revisited


I don't have a lot of pictures to show you all the things that we did but I want to share anyways because I know that there aren't a lot of ideas for a Wiggles party online. The picture shows a play tent I bought at a local kids consignment sale a few years back. Everything else we did can be copied and reused should you need to for your own party.

FOOD: Since we were having an afternoon party, I didn't serve lunch type food. I only served a fruit salad made from blueberries, strawberries, pineapple and purple grapes along with "crunchy munchy honey cakes." I shared that recipe a few posts back, I got the recipe from the Wiggles website. The cake I ordered locally from a bakery, and used a picture I found on the internet. We also had icecream, water and juice packs. I called this table "Anthony's Snack Table."


DECOR: This is pretty simple, you can decorate with the four primary colors. I also used green for Dorothy the Dinosaur and black or hot pink for Captain Feathersword. You could also use brown for Wags the dog.

GAMES: This is the biggie. I had three tables setup for crafts, the tent for play (and I had some books in the tent), and a bean bag game that I called "Jeff's Pillow Toss."
The first table was "Music with Murray." The two crafts were to make the twirly spoon drum I have featured in a previous post and a shaker egg. The shaker egg was just a plastic Easter egg filled with rice and taped around the opening.
The next table was for Captain Feathersword. I found a template online for pirate hats made from foam. Google pirate hat template. I would attach it here but since it isn't my personal template, I really can't do that. I precut all the hats and had foam stickers to decorate them. The other craft was a pirate pop-up. Basically you cut a slit in the bottom of a paper cut, print out and cut out a small picture of Captain Feathersword. Then glue the picture to one end of a popsicle stick and insert the other end so that the pirate is "hiding" in the cup. Pop up, pop down!
Finally I had a table for Dorothy the dinosaur. At this table we made garden pinwheels (I wrote a post on this as well), and we had color sheets. I downloaded these from the Wiggles website.

Once everyone seemed done with the crafts,m we played a few rounds of Hot Potato. iTunes has a large selection of Wiggles music that played the whole party. We had a separate dance area with balloons for the kids.

GOODY BAG: I didn't do a goody bag but instead bought a bunch of bubbles and made my own stickers for the tops of the lids. I also took paper lunch bags and made stickers to put on them for the kids to put their crafts. It was a pretty low-sugar party.

I hope you found some useful ideas for your own Wiggle party! Leave me a comment with your own ideas.

Friday, April 13, 2012

Crunchy munchy honey cakes - sort of

In keeping with the Wiggles birthday party theme, I decided to try and make "crunchy munchy honey cakes," as featured on a Wiggles song. However I ran into trouble finding muesli flakes, so I substituted quick cooking oats. They taste pretty good, however they didn't flatten into a "cake," they stayed ball shaped.

Your cast of characters:

3 cups muesli flakes (or quick cooking oats) | 1/2 cup sugar | 1c self rising flour, sifted | 1c coconut
125 grams butter (about 9 tbsp) | 2tsp honey | 3tbsp milk

Combine dry ingredients. Heat butter, milk and honey over medium heat. Mix well and pour over dry ingredients. Mix well.


Roll into balls the size of walnuts and place on a greased baking tray. Bake in a preheated oven at 350  degrees for about 20 minutes or until golden brown.


I felt they were a tad boring so I melted some chocolate and drizzled over the top. What isn't improved by chocolate?

Wednesday, April 11, 2012

Not just for Easter

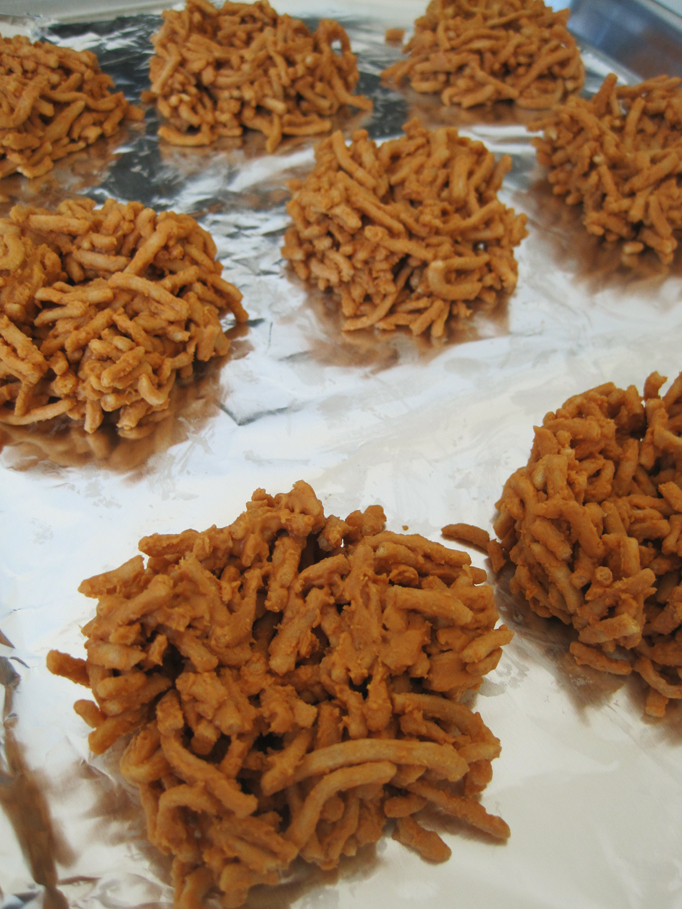
As I have mentioned, my sweet girl's birthday is this weekend, so she is going to take a snack to school tomorrow I have done cookies for the last two years and I wanted to do something different. When I was browsing around Pinterest one day, I saw the simple recipe for birds nests. I first had one when I was in elementary school. It is hard to believe that I can remember that far back, but it definitely left an impression. So here is my favorite version. You can make it your own by substituting any kind of meltable chocolate, or by mixing them.


12 oz chow mein noodles | 12 oz butterscotch chips | chocolate eggs, or whatever you want to use as eggs

Melt the butterscotch chips by microwave or by double boiler, the package will have directions. Mix in the chow mein noodles. This is where all your arm curls come in handy.


Set aside while you line a cookie sheet with aluminum foil or parchment paper. Drop the mixture by the spoonful onto the foil/paper and shape into nests. Make an indention in the middle for the eggs. Let set for about an hour.

Add the eggs. See my little helper's hand? She loved adding the eggs herself.


 We packaged the nests in bags and taped them tight to keep the eggs in place. These would be really cute for a wedding or baby shower.

Tuesday, April 10, 2012

A take on the twirly drum

I don't know what they are called but you have seen them - the drums that you twirl with your hands so that it beats itself. I found a picture online of making something like that using a wooden spoon. I thought that would make a great craft for our Wiggles Birthday party! Here is how you make one for yourself.

All you need is a wooden spoon with a hole drilled in the center, ribbon or string, beads, and scissors.


Cut a piece of ribbon about 3-4 inches long. Make a knot at one end and thred two beads onto the ribbon.


Thread the ribbon through the hole in the spoon.

Add two more beads and tie a knot at the end. All you have left to do is twirl away! If it annoys you that the string can slide around, you can try to tie knots right before and after you thred the ribbon through the hole. However it won't effect how the noisemaker works and it is really difficult to tie knots that close to the hole.

Thursday, April 5, 2012

Custom Word Banners


You see them everywhere, I can even make you one if you need it. But if you decide one day that you would like to give it a try, you can make your own simple, personalized banner in a few easy steps.

First, find some paper that you like. Pick around 4 or 5 different patterns but not too many or your banner will look too disjointed. Then in Word, type out what you want the banner to say in a super-thick font like Arial Black in the size you want the letters to be. Print on a heavy weight paper and cut out. These will be your templates.

Next trace the letters *backwards* on the back of the patterned paper and cut out. You will then need to cut a piece of ribbon the length you want the banner to be. Cut holes with a hole punch or cut slits in the tops of the letters for the ribbon to pass through. Remember that you need at least two cuts, one for the ribbon to go through the front and another for it to pass through the back.

Thread your letters onto the ribbon and space to your taste. I like to turn my banners over and tape across the slits or holes because that will help keep the letters from moving. Enjoy!

An Easy Spring Pinwheel

I am knee deep in some serious birthday party planning for my soon-to-be 4yr old daughter. One of the crafts that I have planned is a small working pinwheel. At this age your child will still need adult assistance but it only takes a minute and the your child will be off to play with their new toy.

You will need glass bead pins, lollipop paper sticks and a piece of paper cut into a square. My paper is 4.5 inches square.

 OPTIONAL
I have a pinwheel template that I printed on my home printer and a tiny hole punch that I used to make it easier but you can skip these steps if you don't have these items or don't need them.


 Cut the paper from the edges toward the middle, but don't cut all the way. If using the punch, cut holes in the alternating corners and the middle of the paper.

 Fold down alternating corners to the middle. Here I lined up the holes that I punched. Then push the pin through the middle of the corners and paper.

 Next, push the pin through the center of the lollipop stick.
All you have left to do now is blow on the pinwheel to make it spin!

 You can use this template to print on your 4.5 inch square paper if you are making multiple pinwheels or if you need the guide.